Greetings! We will start the fourth lesson of our mini-course on preparing a site in WordPress. In this lesson, we will learn how to install a template (theme) on the site. At the end of the lesson, we will have installed our own template.
The lesson is explained in both video and text format. You choose the one that is convenient for you and master the textbook! But we recommend that you familiarize yourself with both.
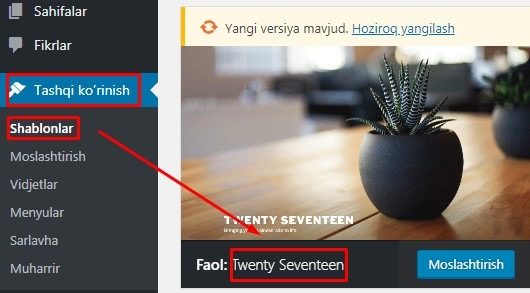
To install a template, go to the Appearance – Templates menu of our WordPress control panel.

On this new page, you’ll see the templates installed in WordPress, the first to be activated on your site.
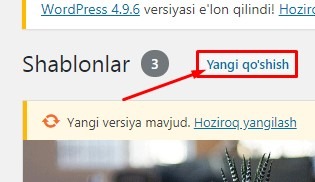
To add a new template, click the Add New button above.

On the newly opened page, if our computer is connected to the Internet, we will see a list of templates, you can install and activate any of them on this page itself. If you are not connected to the Internet, it will not show anything.
Since we are creating a site on the computer itself in our course, there is no need for the Internet in most cases. In this case, we will install the templates (this method will work in any case) by uploading them.
Now we will consider setting up a template in exactly this way.
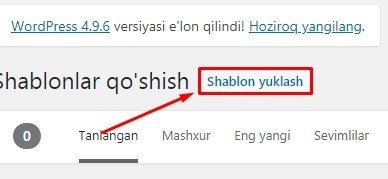
Click on the template download button.

It asks us to upload template files in .ZIP format:

Yes, as you understand, we can find the template we want in .ZIP format. We will learn to find a template on wordpress.org, copy it to our computer and continue our work.
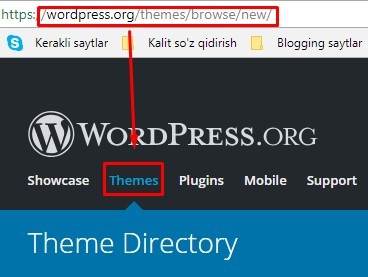
So, we go to wordpress.org and enter the Themes menu.

You can see a list of templates by category below.

Go to More Info to see more information about the template. Click the Preview button on the right to see how it will look on your site.
After choosing a good template, click the Download button to copy it to your computer.
To install this template on the site, we return to the Control Panel and click the Choose File button and select the template in .ZIP format from our computer and click the Install button.

After some time, the template will be installed, click the Activate button below to print it on our site.

If we go to our site and update (subscribe), we will see a new look on the site.

Here we have installed our template.
Now you know how to install and activate your own template on a wordpress site.
We have come to the final part of our lesson, your homework from this lesson will be to install your template.
Our next lesson will be in your mail this time tomorrow.
And now we say goodbye, goodbye!


