
Greetings! We are starting the third lesson of our mini-course on preparing a site in WordPress. This lesson will be about making the basic settings of the site.
These settings must be made before adding additional features to the site, so these are the basic settings.
If you want, you can use the video instruction, if you don’t want, you can master the lesson using the text below the video.
The sequence below is the default settings and you may also see additional settings based on the installed plugins.
- General – General.
- Writing
- Reading – Reading.
- Discussion
- Media – Media file.
- Permalinks – Permalinks.
General Settings
This General Settings section controls the basic settings for your site. This includes the title and location of your site, who can register from the site, and how the times and times can be displayed.
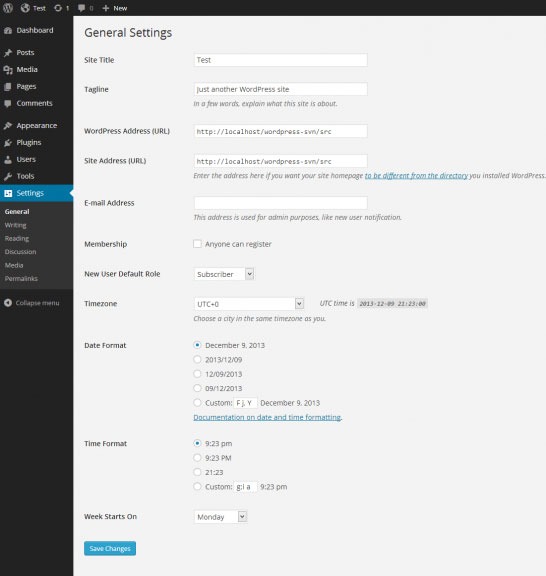
Site title – Site title.
Enter the name of your site or blog here! Many themes (templates) display at the top of each page and in the title bar of the reader’s browser.
Tagline – Symbols.
Briefly describe what your site is about! The slogan or purpose of your site can be written briefly.
WordPress Address (URL) – WordPress address (URL).
Enter the full URL of the directory containing the WordPress core files (includes m-n, wp-config.php, wp-admin, wp-content, and wp-includes). For example, if you installed WordPress in a directory called “blog”, then the WordPress address is http://namuna.uz/blog (here your namuna.uz domain).
Site Address (URL) – Site address (URL).
Enter the address where you want people to access your WordPress site in their browser. This is the directory where WordPress’s main index.php file is installed. This is similar to the WordPress address above.
E-mail Address – E-mail address.
Enter the email address where you want WordPress to send messages regarding the administration and maintenance of your WordPress site. For example, if you allow new users to become members of your site, an email notification will be sent to this address.
Membership – Membership.
Anyone can register – Check this box if you want anyone to be able to register on your site.
New User Default Role – New user role.
This drop-down list allows you to select the default role assigned to new users. This default role is added to newly registered members or users via the Admin > Users > Users screen. The appropriate choices are Admin, Editor, Author, Contributor, or Subscriber.
Date Format – Date format.
The format in which the date is displayed on the site. The date format setting can be used by your site designers to display the date on your site, but does not control how the date is displayed on administrative screens (such as Managing Posts). Click the Save Changes button.
Timezone – Time zone.
From the box, choose the time zone that suits you! Take into account where most of the readers who visit your site come from, for example, if they are from Uzbekistan, choose the time zone accordingly!
Week starts on – Start day of the week.
Select the preferred start time for WordPress calendars in the drop-down box. Monday is the default setting for this dropdown, which means the monthly calendar appears in the first column on Monday. If you want your calendar to show Sunday as the first column, select Sunday from the dropdown.
Site Language – Site Language.
WordPress panel language.
Save Changes – Save changes.
After making all settings, press this button to save.
Writing settings
Use this setting to control the interface you use when writing new articles!
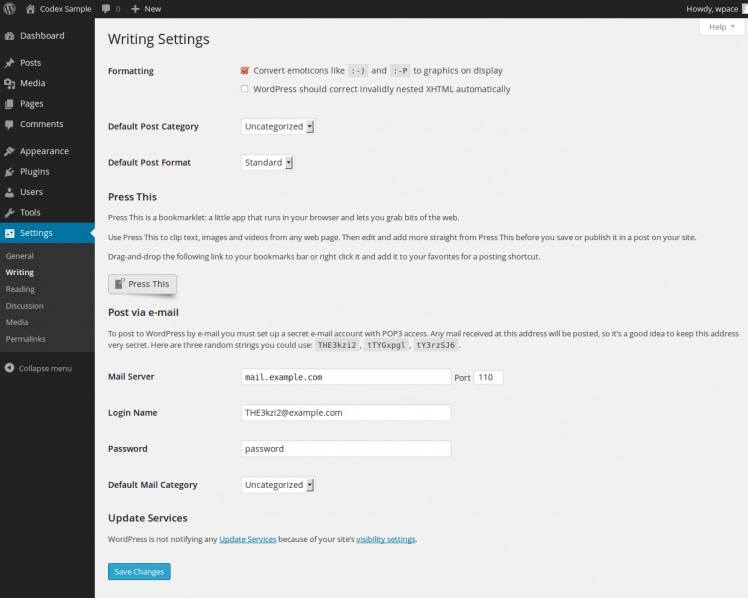
Post settings offer to choose a default category and post format for your site. If you have not assigned any category to your post, then the default category selected here will be used.
You can also set up your email account to send articles directly to your WordPress site from your email inbox. Submitted content will be published with standard mail category.
The service update service allows you to get new content published on your site to pass through search engines, regardless of where it is located. If your site is hidden from search engines in the “Reading” section, this setting is disabled by default.
Reading settings
Reading settings allow you to choose whether the front page for your site is just the front page or your blog articles. You can also set the maximum number of articles displayed on each blog page and control the display of the blog feed.
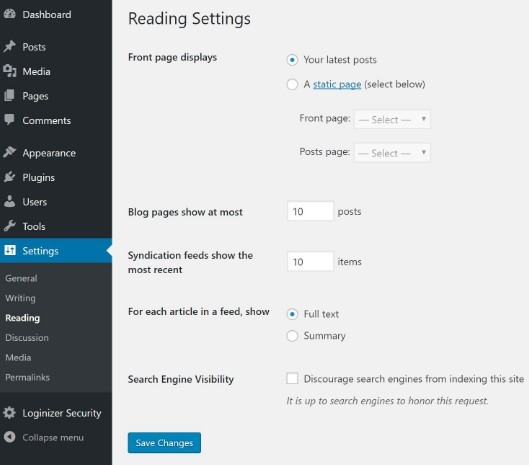
“Discourage search engines from indexing this site” – setting this option requires that search engines do not index this site.
Discussion Settings
These are site-level comment management settings, and some of these options may be overridden by article-level settings. For example, you can turn off comments here completely and turn them on for specific articles.
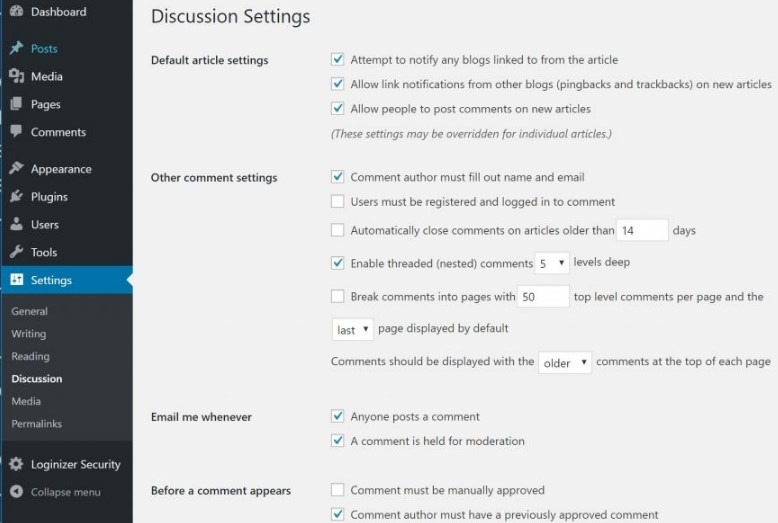
The following are some of the settings you can make under Discussion Settings:
Enable or disable comments on new articles.
Make registration mandatory for commenting.
Automatically close comments after a selected date.
Show comments old or new.
Blacklist for editing and identifying comments (comments) for spam.
Enable or disable avatars.
Set an avatar image for guest comments.
Media Settings
When you upload an image to WordPress, it creates images in different sizes and stores them in a media folder on the server. This field tells WordPress what these dimensions should be.
Before changing these settings, you need to know how big your post content area is. This part can be tricky if the theme doc doesn’t tell you and you don’t know how to read CSS.
Leave Small Image Sizes, Medium Size, and Large Size for now. If you don’t like it, you can change it later.
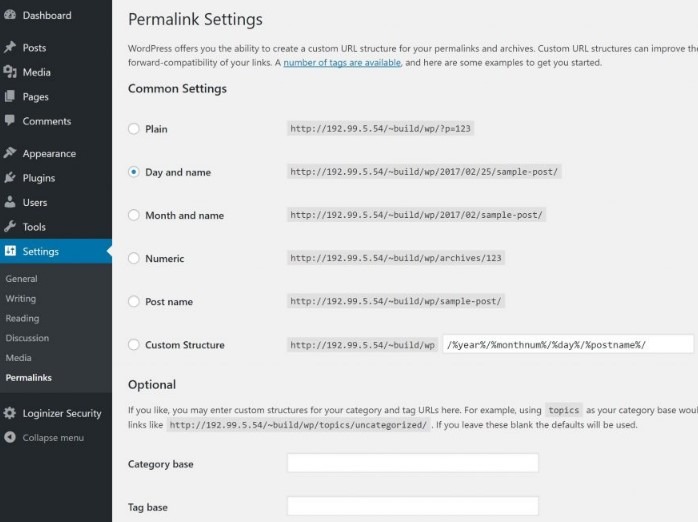
Permalinks Settings
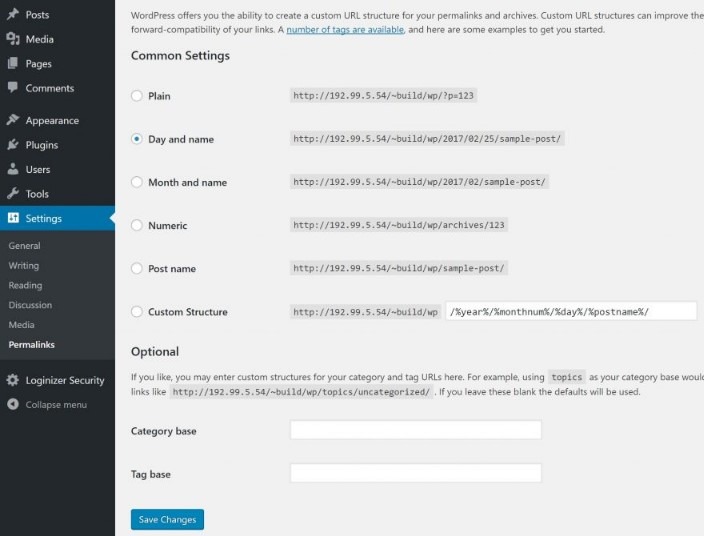
This is one of the most used and important settings in WordPress. Permalinks help to convert permalinks (links, links) into a short form and a descriptive URL, so that users and search engines can better understand the content of the site. The first step after installing WordPress is to choose the appropriate permalinks structure you need for your site. I recommend leaving “%postname%” itself in this.
You can also select categories and tags under the permissions settings for your WordPress blog.
Now you are aware of the basic settings of the wordpress site. The work discussed in this lesson is an assignment for you. Remember that the settings are the first settings.
Lesson four will be in your mail by this time tomorrow.
Of course, complete the tasks, bye! Bless you!


